(→Crane: stragetic to strategic) Tag: Visual edit |
(Updated the logistics guide, still a bit rough, a few slightly outdated images for menus, and missing advanced logi stuff.) Tag: Visual edit |
||
| Line 1: | Line 1: | ||
| − | {{Version|0. |
+ | {{Version|0.37|}} |
| − | In Foxhole, the generation, transportation and co-ordination of supplies is the key to winning the war. The logistics role handles all of these duties and more. Having a well supplied |
+ | In Foxhole, the generation, transportation and co-ordination of supplies is the key to winning the war. The logistics role handles all of these duties and more. Having a well supplied front line with a wide variety of guns, explosives and vehicles to use will give a massive advantage over a lesser stocked enemy. This guide aims to help players understand every aspect of logistics. |
| + | |||
| ⚫ | |||
| + | |||
| + | # Harvesting Raw Resources at Resource Fields [[File:MapIconScrap.png|frameless|30x30px]][[File:MapIconComponents.png|frameless|30x30px]][[File:MapIconSulfur.png|frameless|30x30px]] or Automated Mines [[File:MapIconScrapMine.png|frameless|30x30px]][[File:MapIconComponentMine.png|frameless|30x30px]][[File:MapIconSulfurMine.png|frameless|30x30px]][[File:MapIconFuel.png|frameless|30x30px]]. |
||
| + | # Transporting those Raw Resources [[File:SalvageIcon.png|frameless|30x30px]][[File:Components.png|frameless|30x30px]][[File:SulfurPlaceholder.png|frameless|30x30px]] to a Refinery [[File:MapIconManufacturing.png|frameless|30x30px]] with a Transport Vehicle (a [[Truck]] in most cases). |
||
| + | # Refining those Raw Resources at a Refinery into Materials [[File:Basic Materials.png|frameless|30x30px]][[File:Refined Materials.png|frameless|32x32px]][[File:Explosive Materials.png|frameless|30x30px]] [[File:HeavyExplosiveMaterialIcon.png|frameless|30x30px]][[File:Diesel.png|frameless|30x30px]][[File:Petrol.png|frameless|30x30px]]. |
||
| + | |||
| + | |||
| + | Then there are different possibilities: |
||
| + | |||
| + | A) [[File:Basic Materials.png|frameless|30x30px]] and [[File:Diesel.png|frameless|30x30px]] can be transported directly to the front to be used as is, for repair, construction, and refueling. |
||
| + | |||
| + | B) [[File:Basic Materials.png|frameless|30x30px]][[File:Refined Materials.png|frameless|32x32px]][[File:Explosive Materials.png|frameless|30x30px]] [[File:HeavyExplosiveMaterialIcon.png|frameless|30x30px]] can be transported to a Factory [[File:MapIconFactory.png|frameless|30x30px]] to be used to produce crates of supplies [[File:Crate.png|frameless|30x30px]] (weapons, ammo, etc...). These crates are then either sent to the front or stored in a Storage Depot [[File:MapIconStorageFacility.png|frameless|30x30px]] or Seaport for future use. |
||
| + | |||
| + | C) [[File:Basic Materials.png|frameless|30x30px]][[File:Refined Materials.png|frameless|32x32px]] can be transported to a Garage [[File:MapIconVehicle.png|frameless|30x30px]] or Shipyard [[File:MapIconShipyard.png|frameless|30x30px]] to build Vehicles and Ships. |
||
| + | |||
| ⚫ | |||
| + | |||
| + | |||
| + | Most people focus on one step of the logistics cycle rather than do everything at the same time. |
||
| + | <br /> |
||
== Getting Started == |
== Getting Started == |
||
| + | <br /> |
||
| − | Logistics is a job that is not recommended to do alone, this does not mean having to be constant communication with other people via text or voice, only that it is most efficient to do on a "logistics maps". These change every war depending on starting conditions and player-made actions. You can often find the most active logistics map by looking at the travel tent on home island and finding the backline map with the most amount of players online or by asking other players in chat. |
||
| + | === Where to go === |
||
| − | ''Depending on the status of the current war if one team has pushed very far, there may not be any logistic regions active on the backline as logistic players have moved to a closer region, this scenario will be covered later.'' |
||
| + | Logistics activity is centered around the towns that have the necessary logistics infrastructures to accomplish some if not all steps of the cycle. It's recommended to head to Logistics towns that have all the requirements: a Refinery [[File:MapIconManufacturing.png|frameless|30x30px]], a Factory [[File:MapIconFactory.png|frameless|30x30px]], and a Garage [[File:MapIconVehicle.png|frameless|30x30px]] (to acquire a truck easily). The towns that have that are located in the "back line" regions, away from the front line. Those regions for the warden faction are: Weathered Expanse, Viper Pit, The Moors, Stonecradle, Godcroft, and Oarbreaker (the northernmost regions); and for the colonial faction: Westgate, Heartland, Shackled Chasm, Allod Bight, Tempest Island, and Fisherman's Row (the southernmost regions). Each of these regions have a center town where you are certain to find logistics activity. Head to one of those regions and use your map (press <code>M</code>) to find the town with the refinery and factory icons if you haven't spawned already in the right town. Head to that town. |
||
| + | <br /> |
||
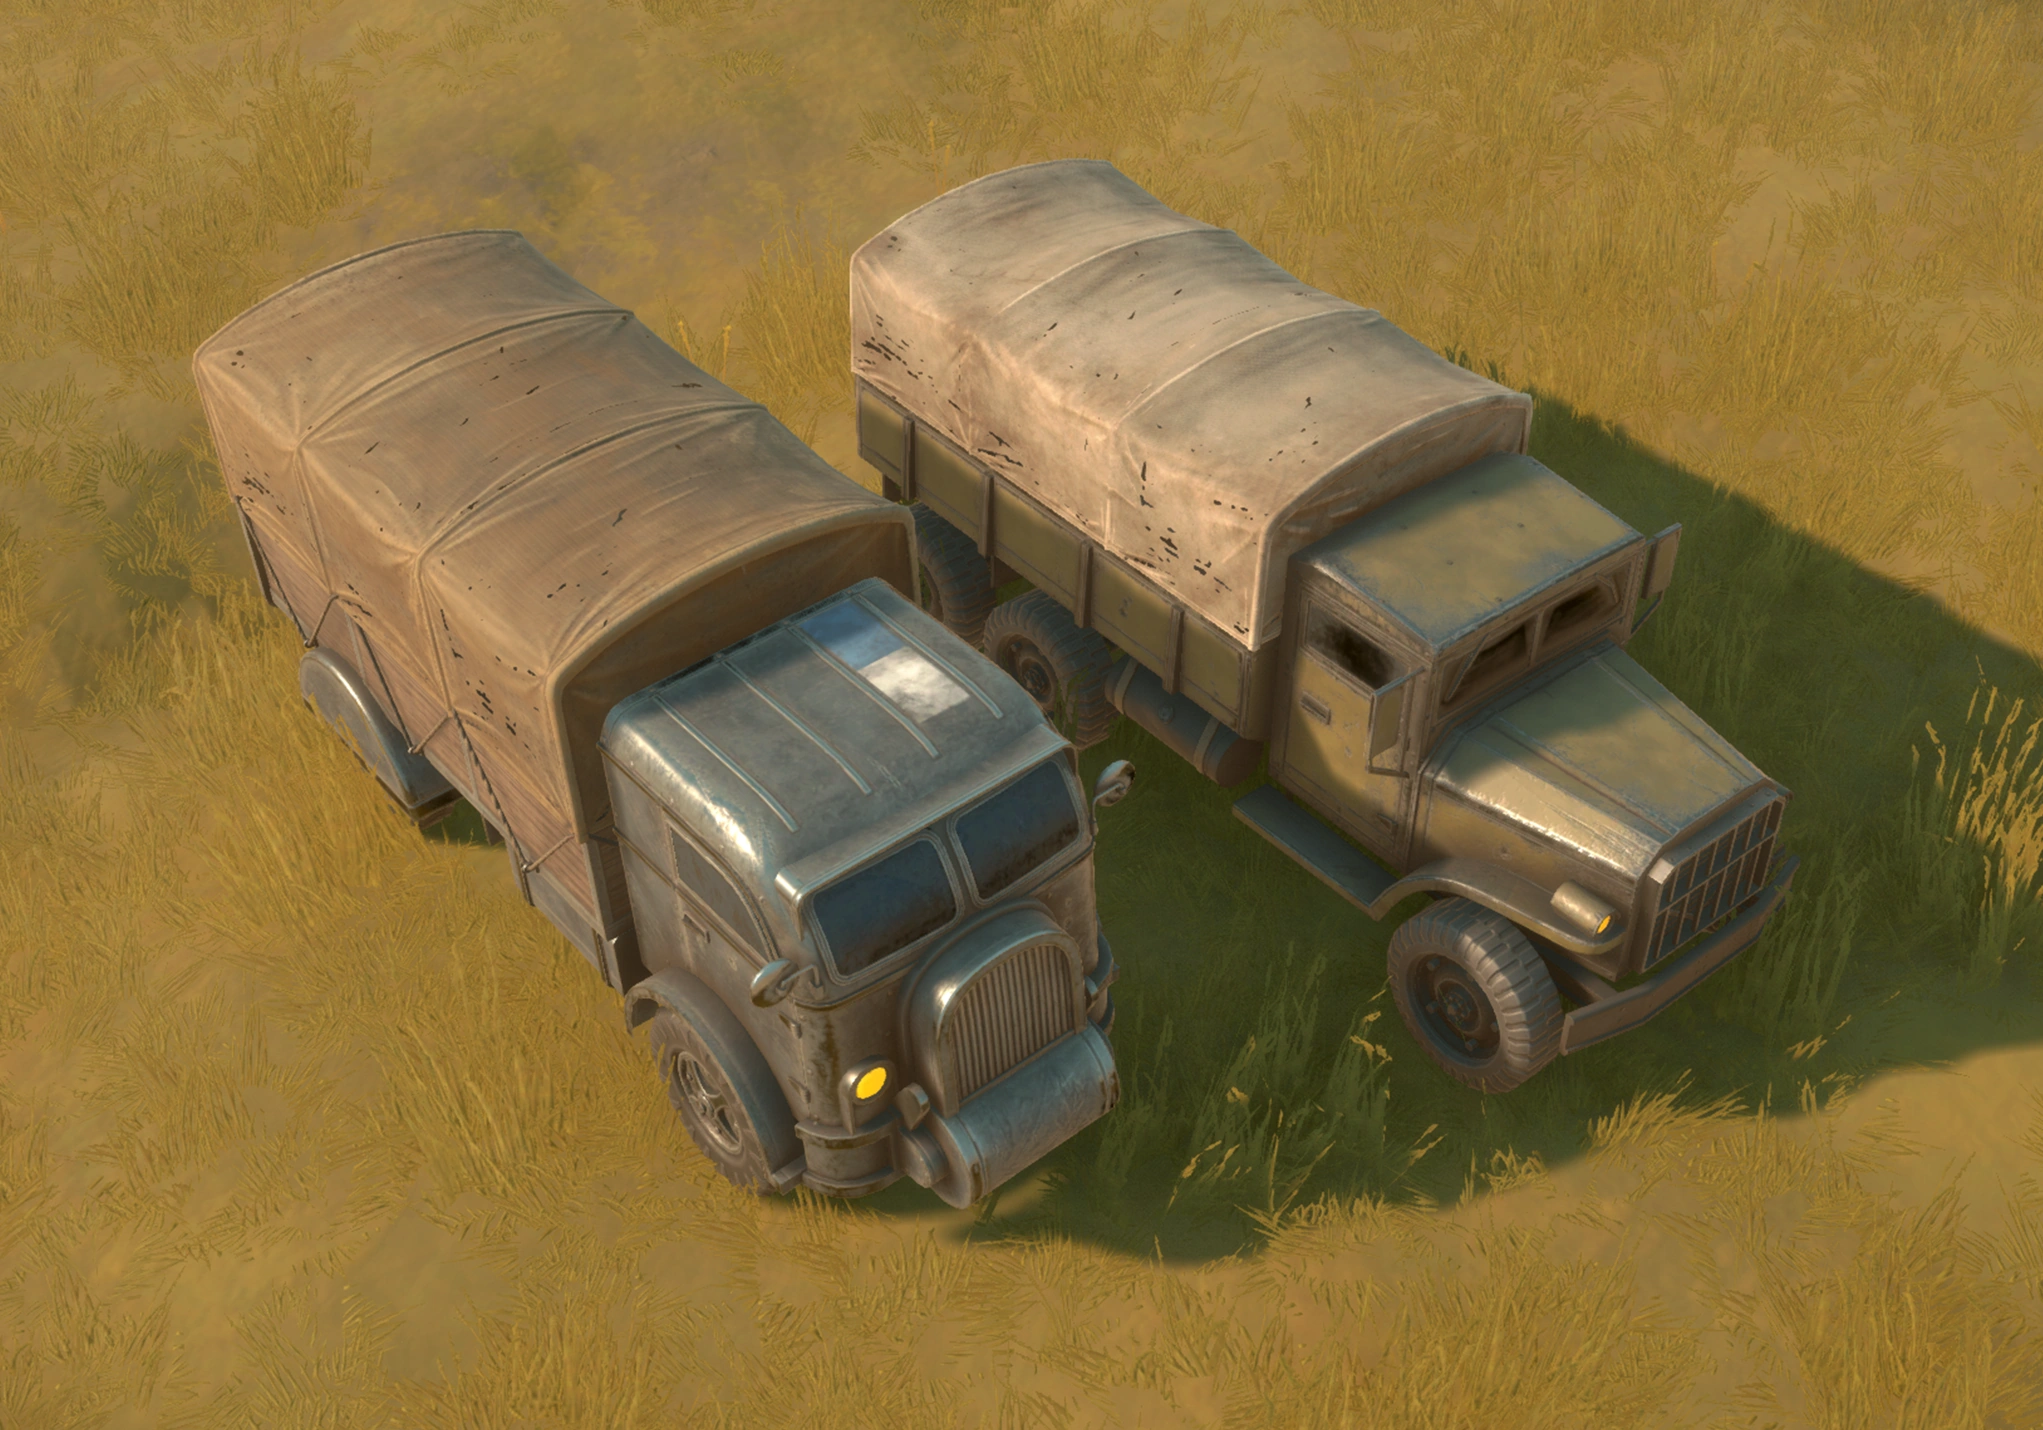
| + | === Acquiring a transport vehicle === |
||
| − | After finding a suitable region, connect to it. |
||
| + | [[File:ScreenshotTransportTrucks.png|frameless]] |
||
| + | Now that you are in the right place, you'll need a [[Truck]] to do logistics. Here are your possibilities in order of preference: |
||
| − | '''IMPORTANT NOTE:''' This guide covers most of the logistics chain, you are not expected to do this entire system when doing logistics, it is a team effort and people focus on specific areas of it, some people may be taking crates from a warehouse and shipping them to frontline, other people focus exclusively on harvesting salvage and submitting it for public use into the refinery, pick something you find yourself enjoying and you can stick with it, every job helps and is important. |
||
| + | # Find an unused, empty, and [[Community Guides/Vehicle Guide#Lock|unlocked]] truck, preferably parked in a parking area (zone with gravel ground), somewhere in the logistics town. |
||
| − | {{#ev:youtube|ym2xZnVm33U|300}} |
||
| + | # Check the nearby [[Storage Depot]] or [[Seaport]] to see if there are Trucks stored in it. Select the Vehicle Category in the top right and click the Truck icon in the menu to retrieve one if there are some. |
||
| + | # Head to the [[Garage]] to [[Community Guides/Vehicle Guide#How to build vehicles|build your own Truck]], check if people have left enough [[Basic Materials]] to build a new truck, you need 100. |
||
| + | # If the Garage doesn't have enough Basic Materials, time to look for some. Check the Refinery's inventory and public stockpile for Basic Materials. |
||
| + | # If still lacking in Basic Materials, check for crates of Basic Materials in the Storage Depot [[File:MapIconStorageFacility.png|frameless|30x30px]]or Seaport. If there are some, click the Basic Material icon in the menu to retrieve a crate, then right click it, and choose the "uncrate" option since you can't spend Basic Materials while in crate form. One crate is 100 Basic Materials so just one crate is enough for a Truck, head back to the Garage. |
||
| + | # Still no Basic Materials? Check the Town's [[Townhall]] [[File:MapIconStaticBase1.png|frameless|30x30px]][[File:MapIconStaticBase2.png|frameless|30x30px]][[File:MapIconStaticBase3.png|frameless|30x30px]] to see if there aren't any Basic Materials in its inventory or stockpile. |
||
| + | # Still nothing? That's unlucky. Talk in Region chat, ask for help from other players. Or try to find a [[Bicycle]] around town, it has only one inventory slot but it's better than nothing. |
||
| ⚫ | |||
| − | The first building you should familiarize yourself with is the refinery, this can be found by opening your map with <code>M</code> and finding the hammer icon [[File:MapIconManufacturing.png|frameless|18x18px]] the icon colour will change depending on whichever team controls it (blue for [[Wardens|Warden]] or green for [[Colonials|Colonial]]) and can only be accessed by these teams. Head to this building and press the interaction button <code>E</code> to open the refinery menu. ''(pictured below)'' |
||
| + | If the Truck is low on [[Community Guides/Vehicle Guide#Fuel|Fuel]], you must find some, either [[Diesel]] or [[Petrol]], and [[Community Guides/Vehicle Guide#Fuel#Refueling|refuel your truck]] first. If there aren't any fuel canisters in the Garage, check the Refinery or the Townhall. If all else fail, ask for help in region chat. |
||
| ⚫ | |||
| ⚫ | |||
| + | Now that you have a transport Vehicle you can do any step of the Logistics Cycle. This Guide will focus on the production steps first and foremost. |
||
| ⚫ | |||
| + | <br /> |
||
| + | === Harvesting Raw Resources === |
||
| ⚫ | For inventory controls, <code>LMB</code> will transfer in small amounts, <code> |
||
| + | First make sure you have a [[Hammer]] on you (if you don't, check the Townhall inventory) and that your truck is empty. Then press <code>M</code> to open your map and locate the nearest [[Salvage]] Field [[File:MapIconScrap.png|frameless|30x30px]]. Other types of Field are rarer, less essential than Salvage, and cannot be harvested with a hammer. |
||
| + | Hover your mouse over it to verify it isn't empty. Fields that have been emptied respawn after roughly 2 hours. Find the closest Field and head there with your truck. |
||
| ⚫ | * |
||
| ⚫ | * |
||
| + | A Resource Field is composed of a large center piece and smaller nodes around it. |
||
| − | === Farming Salvage [[File:SalvageIcon.png|frameless|30x30px]] === |
||
| − | This next section will cover the collection and subsequent refinement of Salvage however there is a few more things to cover before then, namely acquiring the neccessary equipment loadout and a vehicle. |
||
| + | [[File:Salvage Field with harvester.png|frameless]] |
||
| − | '''Note:''' the collection and farming of resources changes through-out the war becoming more stream-lined as more and better equipment is unlocked, for the purposes of this section I'll be sticking with the absolute basic gear available at the start of the war for everyone but near the end of the guide there will be sections on future tech and progression. |
||
| − | ==== Getting a Loadout ==== |
||
| − | When you first spawn you will have a [[Hammer]], a [[Pistol]] and 2 magazines, although this is technically all that is needed for salvage when doing logistics it's always good to have more equipment so for whichever region you spawned at, head to the logistics HQ [[File:MapIcon Home Base.png|frameless|50x50px]]and press <code>E</code> to open the townhall stockpile. If the townhall is stocked (they usually are), you'll want to grab yourself a [[Radio]]. These automatically update your map with all information, you should take a while to open your map and learn what each symbol means. So now we have a radio, but why did we need one in the first place?: |
||
| + | Take out your hammer and start hitting those nodes, an indicator in the bottom left shows you how much Salvage [[File:SalvageIcon.png|frameless|30x30px]] you're collecting each hit. Once your inventory is full, transfer it all into your truck and continue until your truck is full (1500 Salvage). |
||
| − | * Up to date information allows you to avoid enemy attackers, often times players will attempt to hijack and steal enemy logistic supplies. This can ruin an experience but can be often avoided just by staying within watchtower range and checking the map at regular intervals, keep an eye on chat also as team-mates will often call out any enemies (often called partisans). This isn't much of an issue yet as we're only going to be transporting salvage but later when transporting supplies you do not want to lose them. |
||
| − | * Allows you to see which resource fields are empty and which are not, useful for what we're about to do. |
||
| − | * More information like up to date stockpiles in buildings, useful for later on. |
||
| + | When a node is fully depleted, another one from the Field's hidden reserve will spawn after a few second. The center piece cannot be mined, you can press E on it to check how many nodes are left in the Field's reserve. When there are no nodes left and the Reserve is empty the Field is officially empty. Try not to leave a field with just a handful of nodes as the Field's reset mechanism only starts once the Field is truly empty. |
||
| − | [[File:Basiclogisticsloadout.jpg|frameless|268x268px]] |
||
| + | Collecting Salvage can occasionally make [[Iron]] or [[Aluminum]] nodes spawn, harvest them as well. |
||
| − | Whilst you're there you may also want to switch sidearm to a [[Revolver]], grab yourself a [[Bandages|Bandage]], a [[Gas Mask]] and [[Gas Mask Filter|Filter]] and if available a [[Sledge Hammer]]. A sledge hammer harvests salvage at a much faster rate than a hammer although is not available until mid-game. The other gear is available very early in the war and is useful for staying alive, the revolver being more damaging than a pistol and the gas mask and bandage for keeping yourself alive. |
||
| − | ''You can also grab a wrench which will allow you to skip the next section, just be careful when unlocking vehicles as they could still be in use. If someone objects to your unlocking something it is best just to leave it.'' |
||
| + | Once your truck is full or the Field is empty, it's time to head to the Refinery [[File:MapIconManufacturing.png|frameless|30x30px]]. |
||
| − | ==== Getting your First Vehicle ==== |
||
| + | <br /> |
||
| − | ''skip this section if you already know how vehicle factories work-'' |
||
| ⚫ | |||
| + | Park in the front of the refinery and, without leaving your driver seat preferably, press <code>E</code> to open the Refinery's Menu ''(pictured below).'' |
||
| ⚫ | |||
| − | Many different vehicles are available to logistics, some serve the same roles but are more suited to groups such as [[Flatbed Truck|Flatbed Trucks]] for transporting supplies, and some require some prep work before available to be used like [[Harvester|Harvesters]] which has a high fuel usage, for this guide we're sticking with the absolute basics available to everyone and from the start of the war, the [[Transport Truck]] [[File:Transport Truck.png|frameless|50x50px]] . |
||
| − | I will also cover how to use the vehicle factory to build your own truck, although this is often not needed as there are many abandoned trucks free for the taking for those with a wrench or stored freely available in the [[Storage Depot]] [[File:MapIconStorageFacility.png|frameless|25x25px]], outside of this guide I recommend getting a truck this way instead of building a new one, it is a lot quicker and will reduce amount of abandoned vehicles cluttering up areas. |
||
| ⚫ | |||
| − | For now though it is time to get the neccessery Basic Materials [[File:Basic Materials.png|frameless|18x18px]] and Diesel needed to build and fuel a truck , head back to the refinery to get these items. Everything we take from here we shall replace tenfold later so do not worry about taking supplies. We will need 100 basic materials (bmats for short) and 1-2 diesel cans. We can use the stockpile on the right side of the refinery menu to take what we need just click on the icons to ''assemble'' the items. |
||
| + | <br /> |
||
| − | Next we need to open the map, find the [[Vehicle Factory]] [[File:MapIconVehicle.png|frameless|25x25px]] and slowly walk over to it. You will be overencumbered whilst carrying so much which limits speed. |
||
| ⚫ | *'''Inventory:''' Found in most buildings and all vehicles, the amount of inventory slots is different for each. Each slot is able to hold the maximum stack of 100 stackable items or 1 unstackable item. Contains both the building inventory and the player's ''backpack'' (or Vehicle inventory if at the driver seat). |
||
| − | [[File:Vehiclefactory.jpg|frameless|530x530px]] |
||
| ⚫ | For inventory controls, <code>LMB</code> will transfer in small amounts, <code>Shift</code> + <code>LMB</code> will transfer an entire stack, <code>CTRL</code> + <code>LMB</code> will split a stack into 2 halves and <code>ALT</code> + <code>LMB</code> will drop a stack onto the ground for others to pick-up. Alternatively you can use <code>RMB</code> to open a menu with all those options and more listed. |
||
| − | When inside, open the menu to be presented with the production tab. You can click on an icon for the selected vehicle blueprint to appear or hover over the icons for descriptions on the different vehicles + their costs. Find the transport truck icon, click on it and then you can use your hammer to construct the blueprint, each blueprint requires a certain amount of bmats to complete and 1 bmat is used per hammer swing, you can have a maximum of 3 players building 1 blueprint at any time. Building vehicles/structures both work in the exact same way. |
||
| + | <br /> |
||
| − | Once the truck is built, now need to fuel it. To do so, the diesel can must be first equipped by clicking it in your inventory, it goes into the tertiary slot so press <code>3</code> to hold it, then just hold LMB to refuel the vehicle. I'd recommend also pressing <code>L</code> to lock your truck to prevent anyone from taking it, you can also avoid refuelling by hand if there's a fuel truck parked close to the vehicle factory. You can just open your trucks inventory and click the 'Refuel Diesel' button. |
||
| ⚫ | *'''Refinement:''' The refinement tab allows a player to refine raw resources collected into usable materials and parts. Materials are used to produce items and build vehicles and structures. Refining uses the same key-bindings shown above and to refine you must click on the highlighted boxes with the raw resource in either inventory, after a timer (which is shown) the refined goods are able to be picked up. Refined resources are private until picked up. If using the drop-down box to mark the refined goods as public, the refined items will be directly submitted into the- |
||
| − | Now that we have our loadout and our vehicle, it's time to go get some salvage. |
||
| + | <br /> |
||
| ⚫ | |||
| − | The resource fields have only a finite supply and can deplete, taking anywhere from 45 minutes to 8 hours depending on the type of resource it was, salvage being the shortest, sulfur and components being the longest so it's important to check that the field you're heading to isn't depleted. That's one of the reasons we took a radio earlier. To check, you must open the map and hover your mouse over the salvage field icon [[File:Scrap.png|frameless|25x25px]] |
||
| ⚫ | *'''Stockpile:''' The stockpile stores both raw resources that need to be refined and refined materials available for collection by anyone. As logistics is a team-effort it is recommended to refine nearly everything as "public" this allows for people to focus on specific jobs of doing logistics instead of having to do the entire supply chain themselves which is ill-advised. The most commonly collected and refined resource is [[Salvage]] [[File:SalvageIcon.png|frameless|18x18px]], this resource which can be refined into [[Basic Materials]] [[File:Basic Materials.png|frameless|18x18px]], [[Diesel]] [[File:Diesel.png|frameless|26x26px]] or [[Explosive Materials]] [[File:Explosive Materials.png|frameless|18x18px]] is used for the vast majority of items, vehicles and explosives respectively. |
||
| − | [[File:Salvagefieldtooltip.PNG|frameless|285x285px]] |
||
| − | In this image, the salvage field I plan on going to have a supply of 15k left, this is about half of what a salvage field respawns with but is sufficient for now. Salvage is a stackable resource as such our truck is able to hold a maximum of 1500 at one time. When you've found a suitable salvage field drive over to it. |
||
| + | With your truck full of Salvage, choose one of the refinement option. Select whether you want the refinement to be public or private. The refinement process takes more or less time depending on the Material produced. Basic Materials is quick, Explosive Materials is slow. The numbers in the arrows indicates the refinement ratio, 2:1 means it takes 2 raw resources to make 1 material. If you're not sure what to choose, make some Basic Materials (often called bmats). |
||
| − | Collecting salvage is a similar process to building in that you just hold LMB for extended periods of time, there will be many small nodes to farm each node contains 100 salvage. You can view how many nodes are left to spawn by interacting with the large mass located in the middle of the field. Keep farming and collecting salvage until your truck is full, then it's time to head back to the refinery. |
||
| + | Alternatively, you can Right click one of your stacks of Salvage and Click "Submit all to Stockpile" to dump all your truck's content into the Refinery Stockpile for others to take and refine. |
||
| − | === Refining the salvage === |
||
| − | Now that we have a truck full of salvage, we'll want to refine it all into basic materials. At the current ratios (which is shown in the refinery) scrap refines at 2:1 into bmats. Time is also needed to refine, this also changes depending on the resource but for salvage it's roughly ~24 seconds per stack or ~6 minutes to refine an entire truck full. I covered the controls and how to use the refinery in the first section above so scroll up if confused. |
||
| + | If you've found Iron or Aluminum, it's suggested to just dump them in the stockpile. |
||
| − | For this guide, just set your order to "Personal" however during the war you'll typically want to produce everything publicly as nobody is expected to do everything themselves. |
||
| + | |||
| − | Whilst you wait for that to refine, time to move onto the next section. |
||
| + | Collect your Basic Materials (and Explosive Materials if you have some) once they've finished refining and let's head to the nearest Factory. |
||
=== Producing supplies. [[File:MapIconFactory.png|frameless|30x30px]] === |
=== Producing supplies. [[File:MapIconFactory.png|frameless|30x30px]] === |
||
| + | Open the Factory's menu by pressing <code>E</code>, just like with the Refinery. |
||
| − | So now that we've covered how harvesting and refining works, let's move onto how to use the refined materials to produce supplies and items for the frontline. For this section we shall be introducing the [[Factory]] [[File:MapIconFactory.png|frameless|25x25px]] and using the Storage Depot [[File:MapIconStorageFacility.png|frameless|25x25px]], Before we begin we want to have a truck with a substainal amount of bmats, idealy full so assemble some bmats if available in refinery stockpile, but what you've refined will be enough for showcase purposes. As with other buildings, head to the factory with your bmats and open the interface. |
||
[[File:Factoryorders.jpg|frameless|570x570px]] |
[[File:Factoryorders.jpg|frameless|570x570px]] |
||
| Line 88: | Line 109: | ||
* '''Inventory:''' Larger inventory than most other buildings, is capable of storing large amount of materials for easier manufacturing although has no stockpile. |
* '''Inventory:''' Larger inventory than most other buildings, is capable of storing large amount of materials for easier manufacturing although has no stockpile. |
||
| + | |||
| ⚫ | * |
||
| + | <br /> |
||
| ⚫ | * |
||
| + | |||
| ⚫ | *'''Production:''' This tab is where you select what you would like to produce using the factory, production is separated into 5 different categories: Smalls Arms, Heavy Arms, Utility, Medical and Supplies (from left to right). Only one manufacturing order from each category is able to be produced at a time, unlike the Refinery where each player's refining is processed simultaneously. Each order can have a maximum of 4 crates so a maximum of 20 crates can be produced by any 1 person at the same time. Shown in the picture above is a factory from the beginning of the war, as tech progresses more crates of weapons, ammunition and equipment will become available. When making an order, it will appear in the right tab of- |
||
| + | |||
| + | <br /> |
||
| + | |||
| ⚫ | *'''Output:''' This is where players can confirm and start orders picked from the production tab as well as modify and remove items from an order. Orders can also be designated as Personal orders, Squad orders or Public orders and the 3 categories at the top allows you to view current order queue and those being manufactured or available to be picked up. Personal and squad orders when complete have 30 minutes before they are made public and available to everyone, public as the name suggests are always available to everyone. |
||
With your bmats, create multiple different personal orders and start manufacturing, what you make does not matter since this is just a tutorial guide although [[Soldier Supplies]] and [[Rifle|Rifles]] are always in demand and are a good choice if you do not want to "waste" supplies. |
With your bmats, create multiple different personal orders and start manufacturing, what you make does not matter since this is just a tutorial guide although [[Soldier Supplies]] and [[Rifle|Rifles]] are always in demand and are a good choice if you do not want to "waste" supplies. |
||
| + | Note that one person can only queue one order per category and the Factory can only queue 4 total orders per Category. So if you come to the factory and the Category you want already has 4 orders queued you'll have to wait for the first one to finish before you can queue your own order in that category. The orders in the queue of a given category are processed one after the other and not all at the same time. If there are 3 orders in front of yours in a given Category you'll have to wait for those 3 to finish before yours starts getting processed. |
||
| ⚫ | |||
| ⚫ | |||
| ⚫ | |||
| + | |||
| ⚫ | |||
| + | <br /> |
||
| + | |||
| + | ==== The Storage Depot / Seaport [[File:MapIconStorageFacility.png|frameless|25x25px]]==== |
||
| ⚫ | |||
[[File:StorageDepot.jpg|frameless|450x450px]] |
[[File:StorageDepot.jpg|frameless|450x450px]] |
||
| Line 102: | Line 133: | ||
Crates can be assembled by clicking on them, this takes a long time however and it's best done whilst in a truck to benefit from the 2x faster assemble time. This building is where you should submit all crates made in the factory unless you plan on delivering them yourself. If you've decided to do the job of keeping the factories pumping out supplies, it's best to keep an eye on this Storage Depot and the Refinery, you do not want to empty out the refinery of its resources nor fill up this depot to its maximum of 100 crates per item. |
Crates can be assembled by clicking on them, this takes a long time however and it's best done whilst in a truck to benefit from the 2x faster assemble time. This building is where you should submit all crates made in the factory unless you plan on delivering them yourself. If you've decided to do the job of keeping the factories pumping out supplies, it's best to keep an eye on this Storage Depot and the Refinery, you do not want to empty out the refinery of its resources nor fill up this depot to its maximum of 100 crates per item. |
||
| − | For now, just wait until your factory order is done and submit the |
+ | For now, just wait until your factory order is done and submit the crates into the storage depot. |
| + | |||
| ⚫ | |||
| + | What the front ALWAYS needs: Basic Materials, Soldier Supplies, Rifles and SMGs, and their respective ammo. A front cannot be sustained if one of these is missing. |
||
| + | |||
| + | You can check what's in each Base's stockpile by hovering your mouse over their icon on the map. |
||
| + | |||
| + | To supply a front you need a fueled Truck full of crates of goods. It is highly recommended to take a [[Radio]] with you and to only drive on roads covered by [[Watch Tower|Watchtowers]] as it allows you to see on the map whether there are enemies on your road ready to ambush you and steal your shipment. |
||
| + | |||
| + | Retrieve your own crates at the Factory or Take the ones in the public Storage Depot. |
||
| + | |||
| + | Head to the [[Forward Base|FOB]] or [[Static Base|Town hall]] close to the front line that you want to supply, park in front of the building, press <code>E</code> to open the base's menu, right click any of the crates in your truck inventory and choose <code>Submit all to stockpile</code>. Then head back home. |
||
| + | |||
| + | <br /> |
||
=== Next Steps === |
=== Next Steps === |
||
| − | So to conclude, with this 'getting started' section we have learnt how to operate the major logistics buildings of the Refinery [[File:MapIconManufacturing.png|frameless|18x18px]] , Vehicle Factory [[File:MapIconVehicle.png|frameless|25x25px]] , Factory [[File:MapIconFactory.png|frameless|25x25px]] and Storage Depot[[File:MapIconStorageFacility.png|frameless|25x25px]] by learning how to mine, refine, produce |
+ | So to conclude, with this 'getting started' section we have learnt how to operate the major logistics buildings of the Refinery [[File:MapIconManufacturing.png|frameless|18x18px]] , Vehicle Factory [[File:MapIconVehicle.png|frameless|25x25px]] , Factory [[File:MapIconFactory.png|frameless|25x25px]] and Storage Depot[[File:MapIconStorageFacility.png|frameless|25x25px]] by learning how to mine, refine, produce, store and deliver goods. |
That is the basics of logistics covered, the next part of this guide will go into advanced strategies and the different vehicles and resources for logistics although with what you've learned so far is enough for basic supplying. |
That is the basics of logistics covered, the next part of this guide will go into advanced strategies and the different vehicles and resources for logistics although with what you've learned so far is enough for basic supplying. |
||
| + | <br /> |
||
| − | == Upgrade Parts == |
||
| ⚫ | |||
| + | == Aluminum and Iron == |
||
| − | '''Upgrade parts''' (UParts) are used to upgrade the facilities in most structures, these have wide uses, a townhall can be upgraded to provide it with stronger health and resistances, a refinery to enable refining of different resources and a fob to stop the decay of all structures connected to it. When choosing at what to refine a technology part into, it's important to look at what is most needed at that time. Upgrade parts do not stack. |
||
| ⚫ | |||
| + | |||
| + | Aluminum and Iron can be refined into their respective Alloy at the refinery. They can then be spent at the Engineering Center to create Prototype kits of technologies not unlocked yet which advances said technology's progress. |
||
== Logistic Vehicles == |
== Logistic Vehicles == |
||
| Line 121: | Line 167: | ||
It is also recommended to read the vehicle articles for more information. |
It is also recommended to read the vehicle articles for more information. |
||
| − | === |
+ | ===[[Truck]] [[File:Transport Truck.png|frameless|50x50px]] === |
The most commonly used vehicle with room for 6 people, 15 inventory slots and a decent speed. Available from the very start of the war. |
The most commonly used vehicle with room for 6 people, 15 inventory slots and a decent speed. Available from the very start of the war. |
||
| + | |||
| + | ===[[Truck|'Resource' Truck]] === |
||
| + | A variant of the Truck with 20 inventory slots that can only hold raw resources. Must first be unlocked in the Tech Tree. |
||
=== [[Flatbed Truck]] [[File:FlatbedTruckVehicleIcon.png|frameless|50x50px]] === |
=== [[Flatbed Truck]] [[File:FlatbedTruckVehicleIcon.png|frameless|50x50px]] === |
||
| − | A large half-tracked logistics vehicle used to transport [[Shipping Container|Shipping Containers]] and light vehicles via land,requires |
+ | A large half-tracked logistics vehicle used to transport [[Shipping Container|Shipping Containers]], [[Resource Container|Resource Containers]], and light vehicles via land,requires 30 [[Refined Materials]] to be built. [[Shippable|Shippables]] and vehicles must first be packaged before being able to be loaded with a crane. Available from the very start of the war. |
| − | This vehicle is great for salvaging teams when clearing fields, each resource container can hold |
+ | This vehicle is great for salvaging teams when clearing fields, each resource container can hold 50 stacks of a raw resource (5000 total) which can be sufficient enough for 1 container to be filled in the time it takes to off-load a previous container at the refinery creating an efficient supply chain. |
| + | |||
| + | It's also efficient for long-distance Supply transport, since a Shipping Container can hold 40 crates. However delivery is only quick if done at a Storage Depot, otherwise players on the front will have to retrieve crates from the container, one by one. You cannot directly transfer the content of a Shipping Container into a Base. |
||
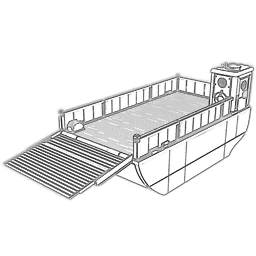
=== [[Fuel Tanker]] [[File:OilTankerIcon.png|frameless|50x50px]] === |
=== [[Fuel Tanker]] [[File:OilTankerIcon.png|frameless|50x50px]] === |
||
| − | A |
+ | A specialized truck able to transport large amounts of [[Fuel]]. Has a limited inventory size of only 2 slots, however each slot is capable of holding 100 cans of either [[Diesel]] or [[Petrol]] which are unstackable inside any other vehicle. |
Often fuel tankers are left beside areas of frequent travel such as a refinery and at the vehicle factory. They are also commonly left beside [[Component Mine|Component]] and [[Sulfur Mine|Sulfur]] mines, a full fuel truck will run either for roughly ~13-14 hours and will take around 20 minutes to build and refuel. (if all supplies are already available). |
Often fuel tankers are left beside areas of frequent travel such as a refinery and at the vehicle factory. They are also commonly left beside [[Component Mine|Component]] and [[Sulfur Mine|Sulfur]] mines, a full fuel truck will run either for roughly ~13-14 hours and will take around 20 minutes to build and refuel. (if all supplies are already available). |
||
| Line 138: | Line 189: | ||
=== [[Crane]] [[File:CraneVehicleIcon.png|frameless|50x50px]] === |
=== [[Crane]] [[File:CraneVehicleIcon.png|frameless|50x50px]] === |
||
| − | A vehicle used to lift packaged shippables, vehicles |
+ | A vehicle used to lift packaged [[Shippable|shippables]], including vehicles. These are one of the most important and vital vehicles to have, they're also the slowest. Ideally you will want multiple of these in strategic places. Cranes at the resource fields are necessary if you want to use flatbeds and resource containers to transport raw resources. |
=== [[Barge]] [[File:Barge.png|frameless|50x50px]] === |
=== [[Barge]] [[File:Barge.png|frameless|50x50px]] === |
||
| − | The first naval logistics vehicle, able to transport 6 people on the deck and has 15 inventory slots, slower than most vehicles and available from the beginning of the war. Is also able to transport most vehicles |
+ | The first naval logistics vehicle, able to transport 6 people on the deck and has 15 inventory slots, slower than most vehicles and available from the beginning of the war. Is also able to transport most vehicles and containers. This is a situational vehicle and can be better or worse than the usual land-based ones. |
=== [[Freighter]][[File:FreighterVehicleIcon.png|frameless|50x50px]] === |
=== [[Freighter]][[File:FreighterVehicleIcon.png|frameless|50x50px]] === |
||
| − | This vehicle is able to transport a large amount of supplies, resources and vehicles. It has a maximum storage of any 5 shippables. This vehicle is best used |
+ | This vehicle is able to transport a large amount of supplies, resources and vehicles. It has a maximum storage of any 5 shippables. This vehicle is best used for stockpiling and supplying the storage depots close to the front line when it is expected a long distance must be traveled. |
| + | |||
== Helpful Logistics Tips == |
== Helpful Logistics Tips == |
||
| Line 150: | Line 202: | ||
* As you're doing logistics you will see in the F1 menu that your commends available increase, these can be distributed however you want, although it's best to commend those working alongside and helping you. |
* As you're doing logistics you will see in the F1 menu that your commends available increase, these can be distributed however you want, although it's best to commend those working alongside and helping you. |
||
| − | * Before crossing a region border, stop at the last fortified area and check your map + chat for any notifications of enemy attackers or partisans, most of those who attempt to steal or disrupt logistic vehicles will be on the region border where |
+ | * Before crossing a region border, stop at the last fortified area and check your map + chat for any notifications of enemy attackers or partisans, most of those who attempt to steal or disrupt logistic vehicles will be on the region border where defenses cannot be built. |
| − | * If salvaging at a resource field with access to a FOB (ideally all |
+ | * If salvaging at a resource field with access to a FOB (ideally all resource fields should have this to fortify the area), you should put excess resources into the FOB as opposed to [[Storage Box|storage boxes]], these allow people to see materials able to be collected by just looking on the map and assembling time is low. |
| − | * Try to get specific requests to their requesters if you happen to be carrying them in your vehicle. If you happen to have excess supplies, someone on the |
+ | * Try to get specific requests to their requesters if you happen to be carrying them in your vehicle. If you happen to have excess supplies, someone on the front lines may need them, so making multiple trips can be worthwhile for the front. Even a single crate of Shirts could change the tide of battle. |
| − | *~add more |
||
| − | |||
| − | == the old page (will be overhauled/removed soon) == |
||
| − | |||
| ⚫ | |||
| − | Here is a brief overview of how a logistics squad should supply troops on the front line. It makes the following assumptions: |
||
| − | * The roads to and from your objectives are secured with built defensive structures. |
||
| − | * The objectives you are delivering to; [[Town Hall|Town Halls]], [[Outpost|Outposts]], and [[Barracks]] are safe and accessible. |
||
| − | |||
| − | ==== Step 1: Ordering ==== |
||
| − | * Orders should be placed in team chat and should include: |
||
| − | ** Type of items |
||
| − | ** Estimated # of items |
||
| − | ** Priority of items |
||
| − | ** Destination for the produced items |
||
| − | * Orders should ideally come from a trusted player on the front |
||
| − | ** Make friends with someone competent on the front |
||
| − | ** Don't just bring orders to places because they are crying for them, verify that it is what they actually need |
||
| − | *** For example if someone is spamming chat that they need RPG shells but their Outpost only has 5 spawn supplies left... they need spawn supplies not shells |
||
| − | *** If people are clamoring for HE grenades but they don't have a single [[First Aid Kit]]/[[Trauma Kit]]/[[Bandages|Bandage]] in the Outpost then they need medical supplies not grenade |
||
| − | |||
| − | ==== Step 3: Queue Orders ==== |
||
| − | At the production facilities when you pick up your orders you will receive [[crate]]s. These [[crate]]s must be taken to a friendly [[Town Hall]], [[Outpost]], or [[Safehouse]]s where they must then be [[stockpile]]d before players can assemble and use them. |
||
| − | * You can queue 4 items at a time per person, use your extra logistics members to make larger order in a single visit |
||
| − | * Manage your queue timers well! Try and get good at timing the completion of a production when you will be passing through that facility again |
||
| − | * If an order is not picked up after 30 minutes it will be placed in the building's inventory that both friendlies and enemies can take. |
||
| − | * Reduce idle time, do not just stand around waiting for orders to complete! There must be something you can do nearby like: |
||
| − | ** Build/repair defenses |
||
| − | ** Take inventory at the Town Hall yourself |
||
| − | ** Call out radio hits using chat or <code>right click</code> button on map screen |
||
| − | ** Scout your town for vulnerabilities or gaps |
||
| − | |||
| − | ==== Step 4: Deliver Goods ==== |
||
| − | Load up your produced [[crate]]s/gear and take it to the front. |
||
| − | * Pay careful attention to where the front is and what radio towers are lit |
||
| − | * Ask players at the front if it is safe! |
||
| − | When you arrive at your destination, stockpiled your [[crate]]s and items '''''directly from your truck''''' into the [[Town Hall]], [[Outpost]], or [[Safehouse]]. You do not need to walk it over just drive right up to it. |
||
| − | * You can actually take items from the structure like [[Fuel]], [[Basic Materials]], [[Refined Materials]], and [[Explosive Materials]] while you are still in the truck much faster than doing it on foot! |
||
| − | Now you have delivered the goods! Good job! Now keep doing that same thing and the war will be over before you know it! |
||
| − | |||
| − | === Logistics Tips & Tricks === |
||
| − | * Manufacturing items closer to the front line will reduce travel time and increase supply for your soldiers |
||
| − | * Safety is important, take the safest available route using a [[Radio]] combined with network of [[Watch Tower]]s along the road |
||
| − | * Keep your truck locked when you are not in it or where enemies could kill you, so enemy will have to destroy it rather than bring it to his own base. |
||
| − | * Before you stop playing the game, unlock your truck in a secure town so others can use it |
||
| − | * You can ferry players to the front, there is no reason why you can't take them to your destination - inform nearby player using Local channel or voice, or at least lock/unlock vehicle several times in front of spawn point. |
||
| − | * Watch your speed in tight roads, also honk when you are starting movement in crowded areas to lower your chance of running someone over. |
||
| − | * If your team has a factory secured, always order a batch of shirts when you go by to keep a constant stream of shirts rolling |
||
[[Category:Gameplay]] |
[[Category:Gameplay]] |
||
Revision as of 12:53, 14 August 2020
This article could contain outdated information that is inaccurate for the current version (1.52) of the game. It was last updated for 0.37.
In Foxhole, the generation, transportation and co-ordination of supplies is the key to winning the war. The logistics role handles all of these duties and more. Having a well supplied front line with a wide variety of guns, explosives and vehicles to use will give a massive advantage over a lesser stocked enemy. This guide aims to help players understand every aspect of logistics.
The Logistics Cycle
- Harvesting Raw Resources at Resource Fields


 or Automated Mines
  .
. - Transporting those Raw Resources to a Refinery with a Transport Vehicle (a Truck in most cases).
- Refining those Raw Resources at a Refinery into Materials .
Then there are different possibilities:
A) ![]() and
and ![]() can be transported directly to the front to be used as is, for repair, construction, and refueling.
can be transported directly to the front to be used as is, for repair, construction, and refueling.
B) ![]()
![]()
![]()
![]() can be transported to a Factory
can be transported to a Factory ![]() to be used to produce crates of supplies
to be used to produce crates of supplies ![]() (weapons, ammo, etc...). These crates are then either sent to the front or stored in a Storage Depot
(weapons, ammo, etc...). These crates are then either sent to the front or stored in a Storage Depot ![]() or Seaport for future use.
or Seaport for future use.
C) ![]()
![]() can be transported to a Garage
can be transported to a Garage ![]() or Shipyard
or Shipyard ![]() to build Vehicles and Ships.
to build Vehicles and Ships.
D) The Materials can be transported to a Storage Depot ![]() or Seaport to be stored for future use.
or Seaport to be stored for future use.
Most people focus on one step of the logistics cycle rather than do everything at the same time.
Getting Started
Where to go
Logistics activity is centered around the towns that have the necessary logistics infrastructures to accomplish some if not all steps of the cycle. It's recommended to head to Logistics towns that have all the requirements: a Refinery ![]() , a Factory
, a Factory ![]() , and a Garage
, and a Garage ![]() (to acquire a truck easily). The towns that have that are located in the "back line" regions, away from the front line. Those regions for the warden faction are: Weathered Expanse, Viper Pit, The Moors, Stonecradle, Godcroft, and Oarbreaker (the northernmost regions); and for the colonial faction: Westgate, Heartland, Shackled Chasm, Allod Bight, Tempest Island, and Fisherman's Row (the southernmost regions). Each of these regions have a center town where you are certain to find logistics activity. Head to one of those regions and use your map (press
(to acquire a truck easily). The towns that have that are located in the "back line" regions, away from the front line. Those regions for the warden faction are: Weathered Expanse, Viper Pit, The Moors, Stonecradle, Godcroft, and Oarbreaker (the northernmost regions); and for the colonial faction: Westgate, Heartland, Shackled Chasm, Allod Bight, Tempest Island, and Fisherman's Row (the southernmost regions). Each of these regions have a center town where you are certain to find logistics activity. Head to one of those regions and use your map (press M) to find the town with the refinery and factory icons if you haven't spawned already in the right town. Head to that town.
Acquiring a transport vehicle
Now that you are in the right place, you'll need a Truck to do logistics. Here are your possibilities in order of preference:
- Find an unused, empty, and unlocked truck, preferably parked in a parking area (zone with gravel ground), somewhere in the logistics town.
- Check the nearby Storage Depot or Seaport to see if there are Trucks stored in it. Select the Vehicle Category in the top right and click the Truck icon in the menu to retrieve one if there are some.
- Head to the Garage to build your own Truck, check if people have left enough Basic Materials to build a new truck, you need 100.
- If the Garage doesn't have enough Basic Materials, time to look for some. Check the Refinery's inventory and public stockpile for Basic Materials.
- If still lacking in Basic Materials, check for crates of Basic Materials in the Storage Depot or Seaport. If there are some, click the Basic Material icon in the menu to retrieve a crate, then right click it, and choose the "uncrate" option since you can't spend Basic Materials while in crate form. One crate is 100 Basic Materials so just one crate is enough for a Truck, head back to the Garage.
- Still no Basic Materials? Check the Town's Townhall to see if there aren't any Basic Materials in its inventory or stockpile.
- Still nothing? That's unlucky. Talk in Region chat, ask for help from other players. Or try to find a Bicycle around town, it has only one inventory slot but it's better than nothing.
If the Truck is low on Fuel, you must find some, either Diesel or Petrol, and refuel your truck first. If there aren't any fuel canisters in the Garage, check the Refinery or the Townhall. If all else fail, ask for help in region chat.
Now that you have a transport Vehicle you can do any step of the Logistics Cycle. This Guide will focus on the production steps first and foremost.
Harvesting Raw Resources
First make sure you have a Hammer on you (if you don't, check the Townhall inventory) and that your truck is empty. Then press M to open your map and locate the nearest Salvage Field ![]() . Other types of Field are rarer, less essential than Salvage, and cannot be harvested with a hammer.
. Other types of Field are rarer, less essential than Salvage, and cannot be harvested with a hammer.
Hover your mouse over it to verify it isn't empty. Fields that have been emptied respawn after roughly 2 hours. Find the closest Field and head there with your truck.
A Resource Field is composed of a large center piece and smaller nodes around it.
Take out your hammer and start hitting those nodes, an indicator in the bottom left shows you how much Salvage ![]() you're collecting each hit. Once your inventory is full, transfer it all into your truck and continue until your truck is full (1500 Salvage).
you're collecting each hit. Once your inventory is full, transfer it all into your truck and continue until your truck is full (1500 Salvage).
When a node is fully depleted, another one from the Field's hidden reserve will spawn after a few second. The center piece cannot be mined, you can press E on it to check how many nodes are left in the Field's reserve. When there are no nodes left and the Reserve is empty the Field is officially empty. Try not to leave a field with just a handful of nodes as the Field's reset mechanism only starts once the Field is truly empty.
Collecting Salvage can occasionally make Iron or Aluminum nodes spawn, harvest them as well.
Once your truck is full or the Field is empty, it's time to head to the Refinery ![]() .
.
The Refinery
Park in the front of the refinery and, without leaving your driver seat preferably, press E to open the Refinery's Menu (pictured below).
The refinery is split into 3 different tabs, Inventory, Refinement and Stockpile and 2 smaller tabs of Actions and Facilities.
- Inventory: Found in most buildings and all vehicles, the amount of inventory slots is different for each. Each slot is able to hold the maximum stack of 100 stackable items or 1 unstackable item. Contains both the building inventory and the player's backpack (or Vehicle inventory if at the driver seat).
For inventory controls, LMB will transfer in small amounts, Shift + LMB will transfer an entire stack, CTRL + LMB will split a stack into 2 halves and ALT + LMB will drop a stack onto the ground for others to pick-up. Alternatively you can use RMB to open a menu with all those options and more listed.
- Refinement: The refinement tab allows a player to refine raw resources collected into usable materials and parts. Materials are used to produce items and build vehicles and structures. Refining uses the same key-bindings shown above and to refine you must click on the highlighted boxes with the raw resource in either inventory, after a timer (which is shown) the refined goods are able to be picked up. Refined resources are private until picked up. If using the drop-down box to mark the refined goods as public, the refined items will be directly submitted into the-
- Stockpile: The stockpile stores both raw resources that need to be refined and refined materials available for collection by anyone. As logistics is a team-effort it is recommended to refine nearly everything as "public" this allows for people to focus on specific jobs of doing logistics instead of having to do the entire supply chain themselves which is ill-advised. The most commonly collected and refined resource is Salvage , this resource which can be refined into Basic Materials , Diesel or Explosive Materials is used for the vast majority of items, vehicles and explosives respectively.
With your truck full of Salvage, choose one of the refinement option. Select whether you want the refinement to be public or private. The refinement process takes more or less time depending on the Material produced. Basic Materials is quick, Explosive Materials is slow. The numbers in the arrows indicates the refinement ratio, 2:1 means it takes 2 raw resources to make 1 material. If you're not sure what to choose, make some Basic Materials (often called bmats).
Alternatively, you can Right click one of your stacks of Salvage and Click "Submit all to Stockpile" to dump all your truck's content into the Refinery Stockpile for others to take and refine.
If you've found Iron or Aluminum, it's suggested to just dump them in the stockpile.
Collect your Basic Materials (and Explosive Materials if you have some) once they've finished refining and let's head to the nearest Factory.
Producing supplies.
Open the Factory's menu by pressing E, just like with the Refinery.

Like the refinery this building has 3 different tabs:
- Inventory: Larger inventory than most other buildings, is capable of storing large amount of materials for easier manufacturing although has no stockpile.
- Production: This tab is where you select what you would like to produce using the factory, production is separated into 5 different categories: Smalls Arms, Heavy Arms, Utility, Medical and Supplies (from left to right). Only one manufacturing order from each category is able to be produced at a time, unlike the Refinery where each player's refining is processed simultaneously. Each order can have a maximum of 4 crates so a maximum of 20 crates can be produced by any 1 person at the same time. Shown in the picture above is a factory from the beginning of the war, as tech progresses more crates of weapons, ammunition and equipment will become available. When making an order, it will appear in the right tab of-
- Output: This is where players can confirm and start orders picked from the production tab as well as modify and remove items from an order. Orders can also be designated as Personal orders, Squad orders or Public orders and the 3 categories at the top allows you to view current order queue and those being manufactured or available to be picked up. Personal and squad orders when complete have 30 minutes before they are made public and available to everyone, public as the name suggests are always available to everyone.
With your bmats, create multiple different personal orders and start manufacturing, what you make does not matter since this is just a tutorial guide although Soldier Supplies and Rifles are always in demand and are a good choice if you do not want to "waste" supplies.
Note that one person can only queue one order per category and the Factory can only queue 4 total orders per Category. So if you come to the factory and the Category you want already has 4 orders queued you'll have to wait for the first one to finish before you can queue your own order in that category. The orders in the queue of a given category are processed one after the other and not all at the same time. If there are 3 orders in front of yours in a given Category you'll have to wait for those 3 to finish before yours starts getting processed.
As with most of logistics, it is time-gated and each order will take some time to produce, longer if the Factory is already in use so now is a good time to familiarize yourself with the Storage Depot or Seaport as this will be where we deposit our manufactured crates when complete.
The Storage Depot / Seaport
The Storage Depot stores item crates and vehicles, it is the only building capable of storing both. It is a good staging area between the back line manufacturers (what we're doing now) and the front line truck drivers who will take supplies from here and ship them to the front line.

Crates can be assembled by clicking on them, this takes a long time however and it's best done whilst in a truck to benefit from the 2x faster assemble time. This building is where you should submit all crates made in the factory unless you plan on delivering them yourself. If you've decided to do the job of keeping the factories pumping out supplies, it's best to keep an eye on this Storage Depot and the Refinery, you do not want to empty out the refinery of its resources nor fill up this depot to its maximum of 100 crates per item.
For now, just wait until your factory order is done and submit the crates into the storage depot.
Supplying the front
What the front ALWAYS needs: Basic Materials, Soldier Supplies, Rifles and SMGs, and their respective ammo. A front cannot be sustained if one of these is missing.
You can check what's in each Base's stockpile by hovering your mouse over their icon on the map.
To supply a front you need a fueled Truck full of crates of goods. It is highly recommended to take a Radio with you and to only drive on roads covered by Watchtowers as it allows you to see on the map whether there are enemies on your road ready to ambush you and steal your shipment.
Retrieve your own crates at the Factory or Take the ones in the public Storage Depot.
Head to the FOB or Town hall close to the front line that you want to supply, park in front of the building, press E to open the base's menu, right click any of the crates in your truck inventory and choose Submit all to stockpile. Then head back home.
Next Steps
So to conclude, with this 'getting started' section we have learnt how to operate the major logistics buildings of the Refinery ![]() , Vehicle Factory
, Vehicle Factory ![]() , Factory
, Factory ![]() and Storage Depot
and Storage Depot![]() by learning how to mine, refine, produce, store and deliver goods.
by learning how to mine, refine, produce, store and deliver goods.
That is the basics of logistics covered, the next part of this guide will go into advanced strategies and the different vehicles and resources for logistics although with what you've learned so far is enough for basic supplying.
Aluminum and Iron
Main article: Engineering Center
Aluminum and Iron can be refined into their respective Alloy at the refinery. They can then be spent at the Engineering Center to create Prototype kits of technologies not unlocked yet which advances said technology's progress.
Logistic Vehicles
Main article: Vehicles
This next section will give a brief overview of the various logistics vehicles, their recommended uses and strategies for them.
It is also recommended to read the vehicle articles for more information.
Truck
The most commonly used vehicle with room for 6 people, 15 inventory slots and a decent speed. Available from the very start of the war.
'Resource' Truck
A variant of the Truck with 20 inventory slots that can only hold raw resources. Must first be unlocked in the Tech Tree.
Flatbed Truck

A large half-tracked logistics vehicle used to transport Shipping Containers, Resource Containers, and light vehicles via land,requires 30 Refined Materials to be built. Shippables and vehicles must first be packaged before being able to be loaded with a crane. Available from the very start of the war.
This vehicle is great for salvaging teams when clearing fields, each resource container can hold 50 stacks of a raw resource (5000 total) which can be sufficient enough for 1 container to be filled in the time it takes to off-load a previous container at the refinery creating an efficient supply chain.
It's also efficient for long-distance Supply transport, since a Shipping Container can hold 40 crates. However delivery is only quick if done at a Storage Depot, otherwise players on the front will have to retrieve crates from the container, one by one. You cannot directly transfer the content of a Shipping Container into a Base.
Fuel Tanker
A specialized truck able to transport large amounts of Fuel. Has a limited inventory size of only 2 slots, however each slot is capable of holding 100 cans of either Diesel or Petrol which are unstackable inside any other vehicle.
Often fuel tankers are left beside areas of frequent travel such as a refinery and at the vehicle factory. They are also commonly left beside Component and Sulfur mines, a full fuel truck will run either for roughly ~13-14 hours and will take around 20 minutes to build and refuel. (if all supplies are already available).
Harvester
Main article: Harvester
Crane
A vehicle used to lift packaged shippables, including vehicles. These are one of the most important and vital vehicles to have, they're also the slowest. Ideally you will want multiple of these in strategic places. Cranes at the resource fields are necessary if you want to use flatbeds and resource containers to transport raw resources.
Barge
The first naval logistics vehicle, able to transport 6 people on the deck and has 15 inventory slots, slower than most vehicles and available from the beginning of the war. Is also able to transport most vehicles and containers. This is a situational vehicle and can be better or worse than the usual land-based ones.
Freighter
This vehicle is able to transport a large amount of supplies, resources and vehicles. It has a maximum storage of any 5 shippables. This vehicle is best used for stockpiling and supplying the storage depots close to the front line when it is expected a long distance must be traveled.
Helpful Logistics Tips
This section will show some handy advice that will hopefully help you.
- As you're doing logistics you will see in the F1 menu that your commends available increase, these can be distributed however you want, although it's best to commend those working alongside and helping you.
- Before crossing a region border, stop at the last fortified area and check your map + chat for any notifications of enemy attackers or partisans, most of those who attempt to steal or disrupt logistic vehicles will be on the region border where defenses cannot be built.
- If salvaging at a resource field with access to a FOB (ideally all resource fields should have this to fortify the area), you should put excess resources into the FOB as opposed to storage boxes, these allow people to see materials able to be collected by just looking on the map and assembling time is low.
- Try to get specific requests to their requesters if you happen to be carrying them in your vehicle. If you happen to have excess supplies, someone on the front lines may need them, so making multiple trips can be worthwhile for the front. Even a single crate of Shirts could change the tide of battle.